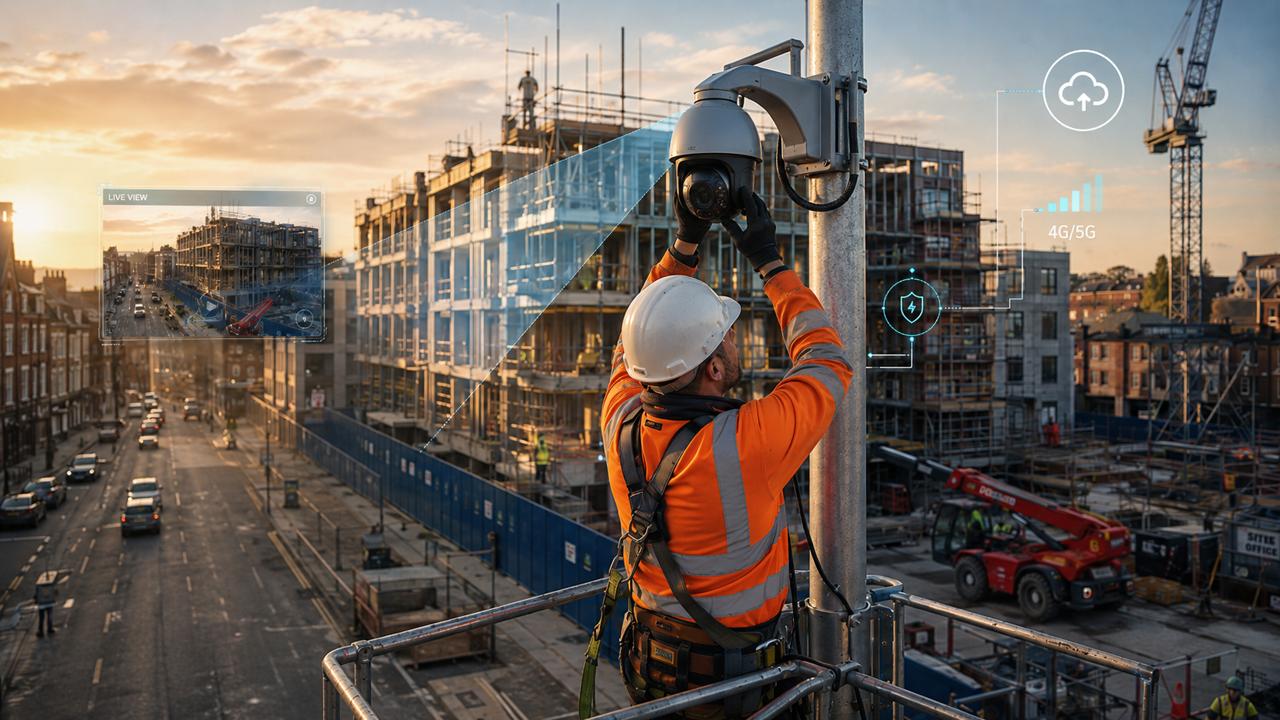
Installing construction cameras is not simply a matter of putting a device on a pole and pointing it at the site.
A good installation needs to be planned around the project: what needs to be seen, who needs access, how long the camera will operate, how it will be powered, how images will be stored, and how the system will support the project team throughout the build.
For modern UK construction projects, cameras can provide much more than security footage. When installed properly, they support remote visibility, progress tracking, stakeholder updates, site documentation, marketing content and a reliable visual archive from start to finish.
The best results come from a careful setup: the right viewpoint, stable mounting, reliable connectivity, suitable power, secure access and a clear purpose for every camera.
Why Construction Camera Installation Matters
A construction site changes every day. Materials arrive, structures rise, access routes move, scaffolding changes, cranes appear, and different trades work across different areas of the site.
If a camera is installed in the wrong position, it may miss the most important part of the project. If it is mounted too low, the view may be blocked within weeks. If the connection is unreliable, the archive may have gaps. If power is not planned properly, the system may fail at the moment it is needed most.
A professional installation helps avoid these problems.
A well-installed construction camera can help project teams:
- check site progress remotely;
- create a dated visual archive;
- produce time-lapse films and progress videos;
- support client and stakeholder updates;
- review site conditions;
- document key milestones;
- support insurance claims or dispute discussions;
- improve communication between office and site teams.
The camera becomes part of the project infrastructure, not just an accessory.
1. Start With the Purpose of the Camera
Before installation, it is important to define what the camera needs to do.
Different purposes require different positions, angles and technical setups. A camera intended for a final time-lapse film may need a wide, attractive view of the whole development. A camera used for project monitoring may need to show access routes, logistics areas or key work zones. A camera used for client updates may need a clean, easy-to-understand view that looks good on a website or in reports.
Common purposes include:
- long-term time-lapse recording;
- live site view;
- remote project monitoring;
- stakeholder reporting;
- marketing and PR content;
- documentation of milestones;
- logistics overview;
- public-facing project updates;
- security awareness.
Clarifying the purpose at the beginning makes every later decision easier.
2. Choose the Right Viewpoint
The viewpoint is the most important part of any construction camera installation.
A good view should show meaningful progress over time. It should capture the main construction area, key elevations, crane activity, access points or the wider site layout, depending on the project’s needs.
For long-term time-lapse, the camera should be positioned where it can continue to see the project as the building rises. A viewpoint that works during groundworks may become blocked once the frame reaches the upper floors. This is why installation planning should consider the full construction programme, not only the current site condition.
Useful viewpoints can include:
- a neighbouring building;
- a mast or pole within the site boundary;
- a crane or temporary structure, where appropriate;
- a site office or welfare unit;
- a fixed high-level point overlooking the project;
- a public-facing elevation for marketing and updates.
The best viewpoint is usually high, stable and wide enough to capture the project clearly without including unnecessary private areas.
3. Plan Mounting, Stability and Weather Protection
Construction cameras often need to stay in place for months or years. They must work through wind, rain, cold weather, dust, vibration and changing site conditions.
A stable mount is essential. Even small movements can affect the quality of long-term time-lapse. If the camera shifts slightly over time, the final film may feel unstable and the visual archive may become harder to compare.
A professional installation should consider:
- strong brackets and fixings;
- resistance to vibration and wind movement;
- safe access for installation and maintenance;
- suitable weather protection;
- cable protection;
- secure positioning away from accidental impact;
- future site changes that may affect the camera.
For UK projects, weather is a practical issue. Rain, low winter light, wind and changing daylight all affect the final image. The camera housing, lens window, seals, cable glands and mounting system should be suitable for long-term outdoor use.
4. Think Carefully About Power
Reliable power is critical.
Some construction sites can provide mains power from a site office, welfare unit or temporary distribution point. Other locations may require solar power or a hybrid setup, especially where the camera is installed in a remote or difficult-to-reach position.
The right power option depends on:
- the length of the project;
- whether mains power is available;
- site working hours;
- camera location;
- access for maintenance;
- power interruptions;
- winter daylight conditions for solar systems;
- the reliability required for the archive.
The goal is simple: the camera should keep working consistently without becoming another problem for the site team to manage.
5. Make Connectivity Reliable
A camera is only useful if the images can be accessed and uploaded reliably.
On many UK construction sites, 4G or 5G connectivity is the most practical option. On some projects, a wired connection or site network may be available. The best choice depends on signal strength, site location, data requirements, access restrictions and how the project team will use the system.
Connectivity planning should consider:
- mobile signal strength at the exact camera position;
- upload frequency;
- image resolution;
- live view requirements;
- data usage;
- remote access;
- cloud storage;
- resilience if the network drops.
A professional setup should be tested before the installation is considered complete. This helps avoid missed images, delayed uploads or unreliable live view.
6. Set the Capture Interval and Image Quality
Not every project needs the same capture settings.
A long-term construction time-lapse may capture images at regular intervals throughout the working day. A busy demolition, steel-frame installation or concrete pour may benefit from more frequent capture. A slower phase may need fewer images.
The capture interval should match the rhythm of the project and the final use of the material.
Key settings include:
- image resolution;
- capture interval;
- working hours or 24/7 recording;
- day and night settings;
- exposure control;
- archive storage;
- live view quality;
- video output requirements.
High-resolution images are important because they give more flexibility later. They allow editors to crop, stabilise, zoom, create stage comparisons and produce polished final films without losing quality.
7. Consider Privacy, Access and Compliance
Construction cameras must be installed responsibly.
In the UK, if a camera captures identifiable people, public areas or neighbouring properties, the system may involve personal data and should be considered in line with UK data protection requirements. The purpose of the camera should be clear, access should be controlled, and people on site should be informed where appropriate.
A responsible setup should consider:
- what the camera is intended to capture;
- whether public areas are visible;
- whether neighbouring properties are visible;
- whether identifiable people may be captured;
- who can access the images;
- how long material is retained;
- whether signage or notices are required;
- how data is stored and protected;
- which views are public and which are private.
This does not make construction cameras difficult to use. It simply means they should be planned properly and used for clear, legitimate project purposes such as progress monitoring, documentation, safety awareness, stakeholder communication and asset protection.
8. Test the View Before Leaving Site
A camera installation should not be considered finished until the view has been checked.
The installer should confirm that the image is level, sharp, stable and correctly framed. The project team should also review whether the camera is showing the right part of the site and whether any important areas are missing.
Testing should include:
- image framing;
- focus and sharpness;
- exposure and brightness;
- upload to the cloud platform;
- live view access;
- capture interval;
- power status;
- mobile or network signal;
- user access and sharing permissions.
A few minutes of testing at installation can prevent months of poor footage.
9. Maintain the System During the Project
Construction sites change constantly. A camera that works perfectly on day one may need adjustment later.
Scaffolding may block the view. A crane may move. A neighbouring structure may change. The site team may need a new angle for a different construction phase. Dust, rain or debris may affect the lens window.
A good camera service should include ongoing checks and support during the project. This can include:
- remote monitoring of camera status;
- checking image uploads;
- reviewing image quality;
- cleaning or maintenance visits where needed;
- adjusting the view if the project changes;
- replacing or upgrading equipment if required;
- producing progress videos from the archive.
Long-term reliability is what makes the visual archive valuable.
10. Connect Installation With the Final Output
The best construction camera installations are planned with the final output in mind.
If the goal is a marketing film, the camera needs a visually strong composition. If the goal is site monitoring, the view must show operationally useful areas. If the goal is stakeholder reporting, the output needs to be clear, professional and easy to share.
The installation should support:
- live site views;
- daily, weekly or monthly progress videos;
- project dashboards;
- stage comparison;
- website embeds;
- client updates;
- final time-lapse films;
- case studies;
- social media clips;
- tender and presentation content.
A good camera position can create value throughout the whole project, from the first groundworks to the final handover.
A Good Installation Makes the Whole System Work Better
Construction cameras are most effective when the installation is treated as part of the project plan.
The right camera, in the right place, with reliable power, strong connectivity, secure access and a clear purpose can give project teams a practical visual record of the build. It helps people stay informed, review progress and communicate more clearly without relying only on site visits or written updates.
For UK developers, contractors, consultants and property teams, professional installation is what turns a camera into a useful project tool.
It is not just about seeing the site. It is about setting up a reliable visual system that supports the project from start to finish.